Get Ready to Crunch: Homemade Salt and Vinegar Chips
There’s something truly satisfying about the perfect crunch of a potato chip. And when you add a tangy vinegar kick to that crunch, you’ve got yourself a winning snack combination. Salt and vinegar chips are a classic favorite for many, and making them at home can take your snacking experience to a whole new level.
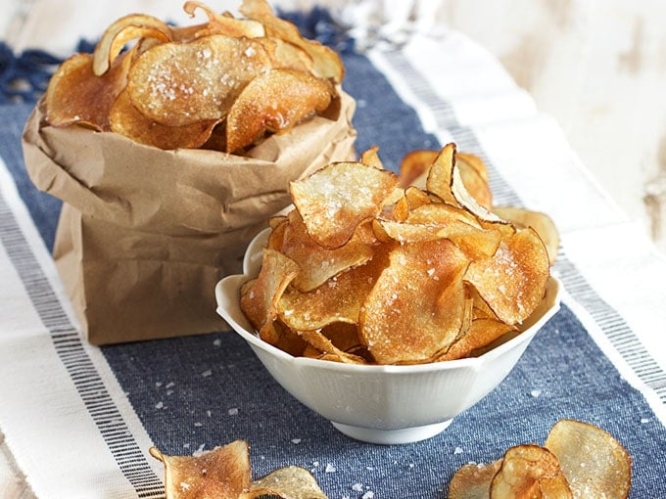
Image Source: thesuburbansoapbox.com
Creating Homemade salt and vinegar chips is not only fun and rewarding, but it also allows you to customize the flavors to suit your preferences. You can adjust the level of tanginess, saltiness, and even experiment with different types of vinegar to create a unique flavor profile that suits your taste buds.
To begin your crunchy journey, you’ll need a few simple ingredients: potatoes, vinegar, salt, and oil for frying. The key to achieving the perfect chip is to slice your potatoes thinly and evenly. This can be done with a sharp knife or a mandoline slicer for more uniform results.
Once you have your potatoes sliced, it’s time to give them a vinegar bath. This step is crucial in infusing the chips with that signature tangy flavor. You can use white vinegar, apple cider vinegar, or even flavored vinegars for a twist. Let the sliced potatoes soak in the vinegar for at least 30 minutes to ensure maximum flavor absorption.
After marinating, drain the potatoes and dry them thoroughly with a paper towel to remove excess moisture. This step is essential for achieving a crispy chip, as any moisture left on the potatoes can result in a soggy end product.
Next, it’s time to fry up your chips to golden perfection. Heat oil in a deep fryer or a heavy-bottomed pot to 350°F and carefully drop in the potato slices in batches. Fry them until they are golden brown and crispy, then remove them from the oil and drain on a paper towel to remove excess oil.
While the chips are still hot, sprinkle them with a generous amount of salt to enhance the flavor. You can also add additional seasoning like pepper, garlic powder, or even a sprinkle of Parmesan cheese for a gourmet touch.
Once your homemade salt and vinegar chips are ready, it’s time to dig in and enjoy the satisfying crunch. Pair them with your favorite dip or enjoy them on their own as a delicious snack. The combination of tangy vinegar, salty goodness, and crispy texture is sure to make these homemade chips a hit with family and friends.
So, what are you waiting for? Get ready to crunch into your own batch of homemade salt and vinegar chips and elevate your snacking game to a whole new level. With a little creativity and a few simple ingredients, you can master the art of making these delicious crunchy creations in the comfort of your own kitchen.
A Flavor Explosion: DIY Potato Chips Done Right
Looking to take your snacking game to the next level? Look no further than Homemade potato chips! These crunchy creations are not only incredibly tasty, but also surprisingly easy to make. And when you add a tangy twist of salt and vinegar, you’ve got a flavor explosion that will have your taste buds dancing.
There’s something so satisfying about biting into a perfectly crispy potato chip. And when you make them yourself, you have complete control over the flavor, texture, and seasoning. Say goodbye to store-bought chips that are loaded with preservatives and hello to wholesome, Homemade goodness.
To start your DIY potato chip adventure, all you need are a few simple ingredients: potatoes, oil, salt, vinegar, and any additional seasonings you desire. The key to making the perfect chip lies in slicing the potatoes thinly and evenly. This can be easily achieved with a mandoline or a sharp knife.
Once you have your potatoes sliced, it’s time to fry them up to crispy perfection. Heat your oil to the right temperature and carefully drop in the potato slices, frying them until they are golden brown and crunchy. Be sure to watch them closely, as they can burn quickly.
But what really sets these homemade potato chips apart is the flavoring. While classic salt and vinegar is always a crowd-pleaser, don’t be afraid to get creative with your seasonings. Try adding garlic powder, onion powder, paprika, or even some grated Parmesan for a unique spin on this classic snack.
The beauty of DIY potato chips is that you can tailor them to your own taste preferences. Prefer a little heat? Add some cayenne pepper. Craving something savory? Sprinkle on some rosemary. The possibilities are endless, so don’t be afraid to experiment and find your own signature chip flavor.
Not only are homemade potato chips delicious, but they are also a healthier alternative to store-bought varieties. You can control the amount of salt and oil used, making them a guilt-free snack option. Plus, making them at home means you can avoid any artificial additives or preservatives commonly found in commercial chips.
So why settle for bland, mass-produced potato chips when you can create your own flavor-packed, crunchy snacks at home? With just a few simple ingredients and a little bit of creativity, you can master the art of making salt and vinegar potato chips that are sure to impress your friends and family.
Whether you’re looking to elevate your snack time or simply satisfy a craving for something salty and crunchy, DIY potato chips are the way to go. So grab some potatoes, heat up that oil, and get ready to embark on a delicious culinary adventure that will have you hooked from the very first bite.
Step-By-Step Guide to Perfect Crunchy Creations
Are you ready to elevate your snack game and master the art of making salt and vinegar potato chips at Home? Look no further, because we have a step-by-step guide to help you create the perfect crunchy creations that will have your taste buds dancing with delight.
Step 1: Gather Your Ingredients
The first step in creating Homemade salt and vinegar potato chips is to gather all of your ingredients. You will need potatoes, white vinegar, salt, and oil for frying. Make sure to choose high-quality potatoes for the best results, as they will provide the perfect base for your crunchy creations.
Step 2: Slice the Potatoes
Next, it’s time to slice the potatoes into thin, even slices. You can use a sharp knife or a mandoline slicer for this step, depending on your preference. Make sure to slice the potatoes thinly to achieve that perfect crunch in every bite.
Step 3: Soak the Potatoes
After slicing the potatoes, it’s important to soak them in a mixture of white vinegar and water. This step not only adds that tangy vinegar flavor to the chips but also helps to remove excess starch, resulting in a crispier end product. Let the potatoes soak for at least 30 minutes to ensure they are fully infused with the vinegar mixture.
Step 4: Dry the Potatoes
Once the potatoes have finished soaking, it’s time to dry them thoroughly. Use a clean kitchen towel or paper towels to pat the potatoes dry, removing any excess moisture. This step is crucial to ensure that the chips fry up crispy and golden brown, rather than becoming soggy during the cooking process.
Step 5: Fry the Potatoes
Now comes the fun part – frying the potatoes to perfection. Heat oil in a deep fryer or large skillet to about 350 degrees Fahrenheit. Carefully add the potato slices to the hot oil, making sure not to overcrowd the pan. Fry the chips in batches, allowing them to cook until they are golden brown and crispy.
Step 6: Season the Chips
Once the chips are fried to perfection, it’s time to season them with salt and vinegar. You can sprinkle the chips with salt immediately after removing them from the oil, allowing the salt to stick to the hot chips. For an extra tangy kick, you can also drizzle some additional vinegar over the chips before serving.
Step 7: Enjoy Your Crunchy Creations
Congratulations, you have successfully mastered the art of making salt and vinegar potato chips at home! Now all that’s left to do is sit back, relax, and enjoy your delicious homemade creation. Whether you’re snacking on them solo or serving them up at a party, these crunchy creations are sure to be a hit with everyone who tries them.
In conclusion, with this step-by-step guide, you can easily create the perfect salt and vinegar potato chips at home. So why settle for store-bought when you can have the satisfaction of creating your own crunchy creations? Get ready to impress your friends and family with these homemade delights that are guaranteed to be a crowd-pleaser.
Elevate Snack Time with Homemade Salt & Vinegar Chips
Are you tired of the same old boring potato chips from the grocery store? Do you want to take your snack game to the next level? Well, look no further! By mastering the art of making salt and vinegar potato chips at home, you can elevate your snack time and impress your friends and family with your culinary skills.
There’s something truly special about the combination of salt and vinegar on a crispy potato chip. The tangy vinegar cuts through the richness of the potato, creating a flavor explosion in every bite. And when you make these chips at home, you have complete control over the ingredients, ensuring a fresh and delicious snack every time.
To get started on your Homemade salt and vinegar chips journey, you’ll need a few key ingredients: potatoes, vinegar, salt, and oil for frying. You can use any type of potato for this Recipes-ideas/’>Recipe, but Russet potatoes are typically recommended for their sturdiness and ability to hold up well to frying.
The first step is to thinly slice the potatoes using a sharp knife or a mandoline slicer. It’s important to slice the potatoes as thin as possible to ensure that they crisp up evenly in the fryer. Once you have your potato slices ready, it’s time to soak them in a mixture of vinegar and water.
The vinegar soak is a crucial step in creating that classic salt and vinegar flavor. It not only adds tanginess to the chips but also helps to remove excess starch from the potatoes, resulting in a crispier end product. Let the potato slices soak for at least 30 minutes, but the longer you can soak them, the better the flavor will be.
After soaking, it’s time to fry up your chips. Heat a pot of oil to 350 degrees Fahrenheit and carefully add the potato slices in batches, making sure not to overcrowd the fryer. Fry the chips until they are golden brown and crispy, then remove them from the oil and place them on a paper towel-lined plate to drain off any excess oil.
While the chips are still warm, sprinkle them generously with salt to taste. The salt will stick to the chips better when they are warm, ensuring that every bite is perfectly seasoned. For an extra punch of flavor, you can also sprinkle additional vinegar on the chips before serving.
Once you’ve mastered the art of making salt and vinegar chips at home, the possibilities are endless. You can experiment with different types of vinegar, such as apple cider or balsamic, to create unique flavor combinations. You can also get creative with your seasonings, adding herbs like dill or garlic powder to give your chips an extra kick.
So why settle for store-bought chips when you can elevate snack time with homemade salt and vinegar chips? With just a few simple ingredients and a little bit of patience, you can create a crunchy and flavorful snack that will have everyone coming back for more. So grab a bag of potatoes and get frying – your taste buds will thank you!
how to make salt and vinegar potato chips